Welcome to FirstAid4Free

Welcome to my first aid site. I'm a first aid trainer and assessor. I've been teaching first aid for about 10 years now. Everyone should have some first aid knowledge for in the home and work place. Not everyone has the chance to attend a full first aid course so I'll provide some key first aid points every week.

Important Notice

The information on this site is for guidance only. The first aid procedures are those in the current edition of the First Aid Manual at the time of inclusion on the site. Attendance on a first aid course to practice these procedures is always recommended.

Head Injuries 3: SKULL FRACTURE


If the mode of injury is a heavy blow to the head suspect a skull fracture. A skull fracture is a very serious injury due to the possibility of underlying damage to the brain. It is good practice to suspect a skull fracture for any casualty that has an obvious head wound or impaired consciousness - treat for the worst, hopefully it won't be that bad. Always suspect that a casualty with a severe head injury has a spinal injury too - maintain a neutral alignment of the casualty's neck and back.

Recognition:
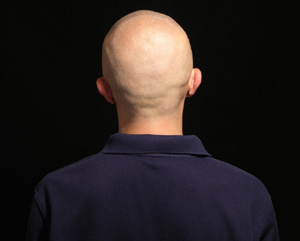
  • Wound or bruise to the head.
  • Soft area or depression of the scalp.
  • Bruising or swelling behind one ear.
  • Bruising around one or both eyes.
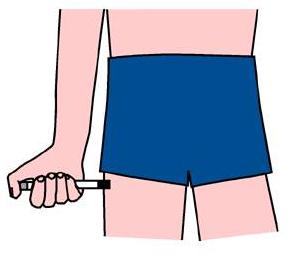
  • Loss of a clear, watery fluid (cerebrospinal fluid) from the ear (a very obvious tell tale sign).
  • Blood shot eyes.
  • Distortion or loss of symmetry about the head or face.
  • Deteriorating responsiveness. Casualty may become unconscious.
Aims:
  • To get urgent medical help.
  • To maintain the casualty's airway and breathing.
Treatment:
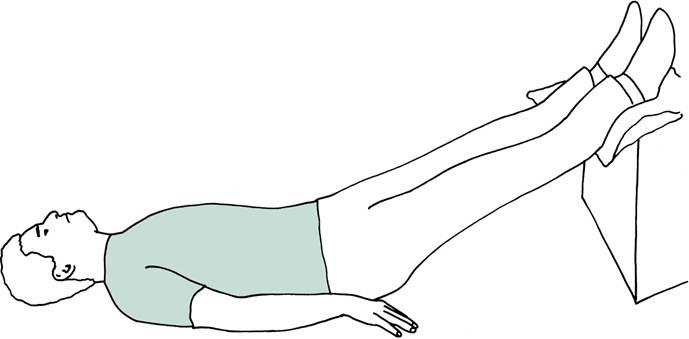
  • If the casualty is conscious help them to lie down. Support the casualty's head. Do not allow the head to rock or turn.
  • Control any bleeding from the head by direct pressure.
  • Send for urgent help. If you are by yourself go and summon help and return to the casualty quickly.
  • If there is a discharge from the ear, lightly cover it with a sterile dressing or pad. Do not plug the ear.
  • Monitor the casualty's responsiveness, airway, breathing and pulse. If the casualty stops breathing be prepared to perform resuscitation.
REMEMBER: Get help urgently and suspect a spinal injury.

Head Injuries 2: COMPRESSION

Cerebral compression is a build up
of pressure on the brain.

Cerebral compression is the condition when there is a build up of pressure pushing on the brain. This can be caused by bleeding in the skull or swelling of the brain tissue after a head injury. It can also occur as the result of an infection (eg. meningitis), stroke or brain tumour. Cerebral compression is a very serious condition and you must get help quickly.

Recognition:
  • Probably (but not always) a history of head injury.
  • Deteriorating level of response - casualty may become unconscious.
Possibly:
  • Intense headache.
  • Noisy breathing, becoming slow.
  • Slow, yet full and strong pulse.
  • Unequal pupil size.
  • Weakness or paralysis down one side of the face or body.
  • High temperature and flushed appearance.
  • Drowsiness.
  • Change of personality such as irritability or confusion.
Aim:
  • Get urgent medical attention for the casualty

Treatment:
  • Dial for an ambulance immediately.
  • Monitor the casualty's level of responsiveness, breathing and pulse.
  • Open and maintain the casualty's airway if necessary.
  • Be prepared to give resuscitation if the casualty stops breathing.
DO NOT allow the casualty to eat, drink or smoke.

COMPRESSION
NEEDS URGENT MEDICAL ATTENTION - SUMMON HELP IMMEDIATELY.


Quick Review: ScrubsGallery.com

The attractive Frog's Nite Out print.

This post is sponsored by ScrubsGallery.com. To view my policy on sponsored entries click HERE.

ScrubsGallery.com is a comprehensive online uniform boutique for medical professionals. Their website is neatly organised, easy to navigate and packed full of products meaning you'll have no problems finding the medical uniform you are looking for. I like the range of printed tunics they have on sale, ranging from floral designs to modern abstract art - something for every occasion (and sense of humour). Payment is by means of the website, telephone, PayPal or mailed certified check and they offer speedy delivery and friendly service.

For more information about medical uniforms why not have a look at ScrubsGallery.com?

Head Injuries 1: CONCUSSION

The brain is naturally cushioned in the skull by a surrounding fluid. If the head is suddenly or violently moved the brain if free to shake a little bit - this is concussion. Concussion is a common occurence on the sports field, traffic accidents, after falls or after being hit on the head.

This shaking produces a temporary disturbance to the normal brain activity. It doesn't normally result in long term damage, if recognised and treated correctly. Concussion may result in impaired consciousness, but this usually subsides quickly. Concussion can be confidently diagnosed when the casualty is seen to recover. A casualty who is concussed should be monitored and medical attention sought if they begin to vomit, develop a headache or blurred vision. A sports player who has suffered concussion should NEVER be encouraged to play on.

Recognition:
  • Impaired consciousness following a blow to the head. The casualty will appear to recover shortly afterwards.
  • There might also be dizziness, blurred vision, headache or a loss of memory.
Aims:
  • To observe the casualty.
  • Ensure a responsible person remains with the casualty until they recover.
  • To obtain medical aid if there is any deterioration in the casualty's condition (see above).
Treatment:
  • Monitor and record vital signs - level of response, pulse, and breathing. Even if the casualty appears to recover fully, watch them for subsequent deterioration in his level of response.
  • When the casualty has recovered, place him in the care of a responsible person.
  • Advise the casualty to go to hospital if, following a blow to the head, they later develop:
    • headache,
    • nausea,
    • vomiting, or
    • excessive sleepiness
If the casualty does not fully recover OR there is a deteriorating level of response after the initial recovery, call for an ambulance.

Quick Review: Feller Medical

Baldness is a terrible affliction - sometimes
a wig just doesn't do the job!


This post is sponsored by Feller Medical. To view my policy on sponsored entries click HERE.

People often say that as you get older, you also get wiser. It's also true that as you get older you start to get forgetful, saggier and your hair falls out. If you are particularly concerned about your thinning thatch you might consider a hair transplant. New York based Feller Medical offer practical and permanent hair loss solutions. Dr. Feller personally examines each patient and discusses their requirements before treatment begins. Hair restoration techniques include traditional strip hair transplants and the newer, scalpel-free fue hair transplant technique. If you would like to learn more visit the Feller Medical website.

Welcome to FirstAid4Free

A tiny piece of housekeeping I have so far neglected - the firstaid4free small print:

About this Blog:
FirstAid4Free is a free guidance source for use in the home and work place. It gives details of the first aid procedures recommended by the Voluntary Aid Societies of the United Kingdom at the time of inclusion on this site. First aid procedures are continually being updated and refined - I will endeavour to keep FirstAid4Free updated too, but I recommend you consult the current edition of the First Aid Manual to get the latest 'accepted practice'.

Firstaid4Free is not a substitute for proper hands-on first aid training by an experienced trainer. I always recommend that you attend an HSE accredited first aid course if you have the opportunity.

Sponsored Entries:
Please note that FirstAid4Free may occasionally include sponsored entries. I will endeavour to write all sponsored entries in a tone which reflects my true opinion of the subject - advertisers please be aware of this before you submit your proposal. Sponsored entries will always include the words 'advertisement' or 'sponsored post'. I hope that these posts do not detract from your enjoyment of my other posts.

Copyright Notice:
If you find any of the information on this site useful you are free to reproduce and republish it elsewhere on condition that you acknowledge and provide a back link to FirstAid4Free.

Severe Allergic Reactions (Anaphylaxis)

Using the EpiPen.

Anaphylaxis is a severe allergic reaction with symptoms that develop within minutes of being triggered. It causes swelling of the airways resulting in impaired breathing, collapse and is potentially fatal. A casualty experiencing anaphylaxis needs urgent medical attention immediately - don't delay calling an ambulance.

Quite often the casualty knows that they suffer from anaphylaxis and they make adjustments to their life to avoid the triggering factor. Those with severe allergies also carry medication as a precaution. Some of the more common triggers include peanuts, fish, rubber, dust and insect stings. Be aware that a person can suddenly develop a severe reaction to a product they have had trouble-free exposure to in the past.

Recognition:
  • Impaired breathing.
  • Wheezing and gasping for air.
  • Signs of shock.
  • Widespread blotchiness of the skin.
  • Swelling of the lips, tongue and throat.
  • Puffiness of the eyes.
  • Anxiety.
Treatment:
  • Call for an ambulance immediately.
  • Check the casualty for medication and medi-lert bracelet.
  • Help the casualty to administer their medication. Sufferers of severe allergies usually carry epinephrine (adrenaline) in an auto injector commonly known as an EpiPen (the brand name of the product).
    • Simply remove the auto-injector from its tube.
    • Remove the protective cap and strike the needle (narrow) end into the casualty's upper thigh at a right angle to the skin.
    • Hold the injector on the thigh for 10 seconds before removing and massaging the injection area for 10 seconds.
    • BE CAREFUL with the used needle and dispose of it safely by sealing it back in the EpiPen tube.
  • If the casualty is conscious sit them in the position that makes breathing easiest.
  • If the casualty becomes unconscious place them in the recovery position.
  • Carefully monitor the casualty's airway and breathing.
  • Be prepared to give CPR if the casualty stops breathing.
ANAPHYLAXIS NEEDS URGENT MEDICAL ATTENTION - SUMMON HELP IMMEDIATELY.

Sprains and Strains

The soft tissues around the bone can become damaged when exerted to sudden or unnatural movement. In general a strain refers to a damaged muscles, whereas a strain refers to damaged ligaments or tendons.

Recognition:
  • The affected area will be painful and tender.
  • The casualty will have difficulty moving the affected area.
  • There may be swelling and bruising.
Aims:
  • Reduce the casualty's pain and swelling.
  • Get medical aid if necessary.
Treatment:
When treating a sprain or strain remember the mnemonic RICE:
  • Rest: Get the casualty to sit or lie comfortably.
  • Ice: Apply an ice pack to the affected area. Avoid applying ice directly to the skin - wrap it in bag, piece of clothing or towel. This will serve to reduce the swelling.
  • Compress: Apply a support bandage and padding around the affected area. Check the circulation beyond the dressing every ten minutes.
  • Elevate: Raise the affected area using a chair, foot stool or similar. This reduces blood flow to the affected area, resulting in less swelling and bruising.
Recommend that the casualty consults their doctor if the symptoms persist for more then a few days. If the casualty is in serious pain or unable to move get them to a hospital.

Foreign Object in the Eye

The eye is very delicate and even the slightest spect on dust on the surface can cause the casualty great discomfort. Usually these objects can be 'blinked' or washed from the eye, but complications can arise if the object is sticking to the eye, penetrating the surface of the eyeball or resting on the iris (coloured part) or pupil. In these cases it is safest to seek proper medical attention.

Recognition:
There is often:
  • Pain and discomfort.
  • Redness and watering of the affected eye.
  • Blurred vision.
  • Eyelid of affected eye tightly shut or in spasm.
Treatment (object on white of eye):
  • Sit the casualty down in bright light and stand behind them.
  • Ask the casualty to tilt their head back and then carefully separate the eyelids with your forefinger and thumb.
  • Carefully examine each part of the eye by asking the casualty to look up, down, left and right.
  • If you can see a foreign object on the white of the eye try and rinse it out with a glass of water or sterile eye wash.
  • Lean the casualty's head towards the injured side and position a towel on their shoulder.
  • If you are unable to rinse the object away, dampen a swab (clean tissue, hankerchief etc.) and try to gently lift the object instead.
  • If lifting the object doesn't work either take the casualty to hospital.
  • If there is an object under the upper eyelid ask the casualty to pull the upper lid down over the lower lid. Hopefully this will brush the object away.
Treatment (iris, pupil or embedded object):
  • DO NOT touch any object sticking to the iris or pupil or embedded anywhere on the eye.
  • Place a sterile eyepad over the eye.
  • Take the casualty to hospital.

Fractures

A fracture is a break or crack in a bone. It usually requires considerable force to fracture a bone unless it is old and diseased, or young and supple. Fractures fall into two broad categories:
  • 'Open fractures' where the bone is protruding through the skin. An open fracture is usually accompanied by significant blood loss - the main priorities in this case are to control the bleeding, keep the injured area still and prevent infection of the open wound.
  • 'Closed fractures' where the damaged bone is contained within the skin. A closed fracture is contained within the skin and there is no external bleeding, although there is usually some internal bleeding caused by contusions (bruises) and tissue damage - the priority here is to keep the injured area still.
Recognition of fractures:
Us first aid trainers have a useful mnemonic to help us remember the signs and symptoms of a fracture: PLUSDICT:
  • Pain
  • Loss of power
  • Unnatural movement
  • Swelling or bruising
  • Deformity
  • Irregularity
  • Crepitus (grinding sound of the bones)
  • Tenderness
Treatment of an open fracture:
  • Put on gloves, if available. Ask the casualty to keep still.
  • Loosely cover the wound with a large, clean, non-fluffy pad or sterile dressing. Apply pressure to control the bleeding but DO NOT press on the protruding bone.
  • Place clean padding over and around the dressing.
  • Secure the dressing and padding with a bandage. Bandage firmly but not so tightly that it impairs circulation.
  • Immobilise the injured area by supporting it with your hands or padding around it with clothing etc.
  • Arrange for the casualty to get proper medical attention.
  • Treat the casualty for shock if necessary - DO NOT raise a fractured leg. Monitor the casualty's level of response, breathing and pulse. Check circulation beyond the bandage every 10 minutes.
  • DO NOT move the casualty until the injured area is supported unless they are in immediate danger. DO NOT press down on the protruding bone. DO NOT allow the casualty to eat, drink or smoke.
Treatment of a closed fracture:
  • Ask the casualty to keep still.
  • Immobilise the injured area by supporting it with your hands or padding around it with clothing etc.
  • Arrange for the casualty to get proper medical attention.
  • Treat the casualty for shock if necessary - DO NOT raise a fractured leg. Monitor the casualty's level of response, breathing and pulse.
  • DO NOT move the casualty until the injured area is supported unless they are in immediate danger. DO NOT allow the casualty to eat, drink or smoke.

Asthma


Calm and reassure the casualty, get them comfortable
and ask them to use their 'reliever' inhaler.


During an asthma attack the muscles of the air passages in the lungs go into spasm and the linings of the airways swell. This results in the airway becoming narrow and breathing becoming more difficult. Sometimes an asthma attack is triggered by an allergy, cold, cigarette smoke or some other external stimulus. Sometimes there is no recognised trigger for the attack - some asthma sufferers have sudden attacks at night. People with asthma usually deal with their own attacks using a 'reliever' inhaler, usually coloured blue, at the first sign of an attack. Asthma sufferers may also have a second 'preventer' inhaler, coloured brown, that reduces the risk of having an attack. The preventer inhaler will not help when an asthma attack in progress.

The main priorities are to calm and reassure the casualty, treat the asthma attack and maintain the casualty's airway.

Recognition:
  • Difficulty in breathing, with a very long breathing-out phase.
  • Wheezing when the casualty breathes out.
  • Difficulty speaking.
  • Signs of hypoxia (low blood oxygen) such as grey-blue lips, earlobes and nailbeds.
  • Distress and anxiety.
  • Coughing.
  • Eventually the casualty may become unconscious and stop breathing.
Treatment:
  • Calm and reassure the casualty.
  • Ask the casualty to take a puff of their reliever inhaler.
  • Ask the casualty to breathe slowly and deeply.
  • Let the casualty adopt the most comfortable position, usually sitting. Do not let the casualty lie down.
  • A mild asthma attack should ease within 3 minutes - if not, ask the casualty to take a second dose from their inhaler.
  • Ring for an ambulance if:
    • this is the casualty's first ever asthma attack.
    • the inhaler has no effect after 5 minutes.
    • the casualty is getting worse.
    • breathlessness makes talking difficult.
    • the casualty is becoming exhausted.
  • Be prepared to give resuscitation if the casualty stops breathing.

Nosebleeds

Nosebleeds are a very common problem in the home and work place. They are caused when the tiny blood vessels in the nostrils become ruptured. This normally occurs due to violent sneezing, nose picking or high blood pressure (hypertension). The main priorities are to stop the bleeding and maintain the casualty's airway.

Treatment:
  • Ask the casualty to sit down, tilt their head forward and pinch the soft part of their nose for 10 minutes. DO NOT allow the casualty to tilt their head backwards - this will cause them to swallow blood, possibly inducing vomiting and choking.
  • Reassure the casualty. Advise them to breathe slowly through their mouth. The casualty should avoid coughing, sniffing and swallowing during the nose pinch.
  • After 10 minutes ask the casualty to release their nose pinch. If bleeding persists they should re-pinch for up to 2 further periods of 10 minutes.
  • If bleeding has stopped cleanse the casualty's face with lukewarm water. Be sure to dispose of any used cleaning materials hygienically.
  • Advise the casualty to avoid exertion for a few hours after the bleeb. They should not blow their nose during this time.
IMPORTANT: If the bleed persists after the 3 x 10 minute nose pinches the casualty should seek medical attention.

Burns and Scalds

The main priorities are to rapidly cool the burn, monitor the casualty's airway, treat for shock and get medical attention if necessary.

Types of burn:
There are 3 main categories of burn:
  • Superficial: Characterised by redness, tenderness and swelling. Only the very surface of the skin is affected. Sunburn is a good example.
  • Partial thickness: Characterised by redness, pain and blistering. The epidermis (top layer of skin) is completely destroyed. Large areas of partial thickness burns need medical attention.
  • Full thickness: The burn is deep through the layers of skin, which may be charred, waxy or pale. Usually not that painful due to nerve damage. Need urgent medical treatment.
Medical attention:
The following types of burn need medical attention:
  • Full thickness burns (all the way through the skin to the underlying tissue).
  • Burns to the face, hands, feet or genital area.
  • Burns which extent the entire way around and arm or leg.
  • Partial thickness burns larger than 1% of the casualty's body surface area (about the area covered by the palm of the casualty's hand).
  • Superficial burns larger than 5% of the casualty's body surface area (about the area covered by 5 palms).
  • Burns with a mixed pattern of varying depths.
  • Any burn you are unsure of - better safe than sorry.
Treatment:
  • Cool the burn area with cold liquid for at least 10 minutes.
  • Severe burns: Lay the casualty down. Call for an ambulance. Be prepared to give CPR if the casualty stops breathing.
  • Keep cooling the burn until the pain subsides.
  • Put on disposable gloves if available. Gently remove any rings, watches, belts or clothing before the tissues begin to sell. Do not remove clothing stuck to the wound. Do not put any ointments or lotions on the wound.
  • Cover the wound with a clean non-absorbent dressing - clingfilm is ideal.
  • Monitor the casualty until help arrives. Treat for shock if necessary.

Shock


Treatment of shock - lie the casualty down, get help and monitor.

Shock is when there is a lack of blood flow to the vital organs, particularly the brain. The organs have a reduced supply of oxygen and a build up of waste products. Serious shock is a killer. It is good practice to assume every casualty has some degree of shock and treat them accordingly.

Casualties who have lost fluid from the body are particularly prone to shock - those suffering bleeding, burns, vomiting, diarrhoea and abdominal injuries.

Signs of shock:
Initially:
  • Rapid pulse.
  • Pale, cold and clammy skin.
  • Sweating.
Later on:
  • Grey-blue skin.
  • Weakness and gidiness.
  • Nausea or thirst.
  • Rapid, shallow breathing.
  • Weak pulse.
Eventually:
  • Restlessness.
  • Gasping for air.
  • Unconsciousness.
Treatment of shock:
  • Lay the casualty down. Lie the casualty down on soft ground, ideally a blanket and raise their legs.
  • Loosen tight clothing.
  • Get help.
  • Monitor the casualty's responsiveness, airway and breathing. Be prepared to give CPR if the casualty stops breathing.
Do not:
  • Allow the casualty to eat, drink, smoke or move.
  • Leave the casualty unattended, other than to go and get help.
REMEMBER - SHOCK IS A KILLER - SUSPECT AND TREAT ALL CASUALTIES FOR SHOCK.

Cardio Pulmonary Resuscitation (CPR)

NOTE: This information should be read in close conjuction with the Rescue Breathing and Chest Compression lessons.

Cardio Pulmonary Resuscitation (CPR):
If the casualty is not breathing by themself you must breathe for them - this is achieved by giving Rescue Breaths. If the casualty has no signs of life it is an indication that blood circulation is absent. As a first aider you must provide the casualty with circulation - this is achieved by giving Chest Compressions. The combination of Rescue Breaths and Chest Compressions is known as Cardio Pulmonary Resuscitation (CPR).

Sequence of CPR:
  • In the case of a casualty needing CPR, the primary survey will be as follows:
    • DANGER - Remove all danger from yourself and the casualty.
    • RESPONSE - The casualty is unresponsive - shout for help.
    • AIRWAY - Ensure the casualty's airway is clear and maintained.
    • BREATHING - The casualty is not breathing.
  • As soon as you see the casualty is not breathing go for help if it is not already on the way (if you suspect the casualty is not breathing due to injury, choking or drowning give 5 rescue breaths followed by 30 chest compressions before going for help).
  • After going for help give the casualty 30 chest compressions.
  • Give the casualty 2 rescue breaths.
  • Continue giving cycles of 30 chest compressions to 2 rescue breaths until either help arrives, or the casualty begins to breathe spontaneously or you become too exhausted to continue.

Rescue Breathing

If the casualty is not breathing by themself you need to breathe for them. This is achieved by giving rescue breaths (commonly known as mouth to mouth).

GO AND GET HELP, if it isn't already on the way, as soon as you know the casualty is not breathing. There is an exception to this rule - if you suspect the casualty is not breathing due to injury, choking or drowning give them 5 rescue breaths and 30 chest compressions before going for help.

Once help is on the way:

  • Give 30 chest compressions as described in the 'Chest Compressions' lesson.
  • Give 2 rescue breaths as follows:
    • Ensure the casualty's airway is kept open (head tilted back and two fingers lifting chin) throughout.
    • Pinch the soft part of the casualty's nose with your finger and thumb. Keep the chin lifted with your other hand.
    • If you have a face shield or pocket mask place it over the casualty's mouth. If not carry on without hesitation.
    • Take a breath and place your mouth over the casualty's. Maintaining head tilt and chin lift blow steadily until the casualty's chest rises. This should take about 1 second.
    • Remove your mouth and look along the casualty's chest, which should fall again.
    • Give a second rescue breath and then give 30 chest compressions.
    • Continue to give rescue breath/chest compression cycles until help arrives, the casualty starts to breathe again or you become too exhausted to continue.
If the chest doesn't rise during your rescue breath:
  • Adjust your position, check the casualty's airway is open and clear and attempt a further 2 rescue breaths.
  • If, after the 2 attempted rescue breaths, you are still unsuccessful give 30 chest compressions without delay.

Chest Compressions

Chest Compressions:
If you find that the casualty has no signs of life (breathing sounds, motion etc) you will need to give them chest compressions.

Chest compressions are given as follows:
  • Kneel beside the casualty and place your hand in the centre of their chest. Your hand should be about 5 cm (2 inches) up from where the lowest right and left ribs fuse.
  • Place the heel of you other hand on top of the first hand and interlock your fingers.
  • Lean well over the casualty, with your arms locked striaght and depress the chest 4-5 cm (1.5-2 inches). Release the pressure without removing your hands from the casualty's chest. Allow the chest to come fully up before giving the next compression. Keep a steady rythm and don't 'bounce' with your compressions.
  • 30 chest compressions should be given at a rate of 100 per minute.
  • After giving 30 chest compressions give 2 rescue breaths (see Rescue Breathing lesson).

Primary Survey 5: CIRCULATION

Primary Survey 5: CIRCULATION:
The current protocols refer to this as checking for 'signs of life'. A sign of life is normal body temperature, normal skin colour, breathing sounds and motion - if any of these are present it is a good sign the casualty still has a heart beat. There is no need to check the casualty for a pulse - indeed, finding a pulse is often difficult and too time consuming.

In the current protocols you will have already started CPR before checking for signs of life - see 'Basic Adult Life Support' and 'Cardio Pulmonary Resuscitation (CPR)' lessons.

Primary Survey 4: BREATHING

Primary Survey 4: BREATHING:

Once the airway is open you must check that the casualty is breathing.

Check for breathing by:
  • Placing your ear next to the casualty's mouth and looking down their chest.
  • Look, listen and feel for breathing sounds and motions for not more than 10 seconds.
If the casualty is unresponsive but breathing place in the recovery position - see 'Recovery Position' lesson.

If the casualty is unresponsive and not breathing you need to give CPR - see 'Basic Adult Life Support' and 'Cardio Pulmonary Resuscitation (CPR)' lessons.

Primary Survey 3: AIRWAY

Primary Survey 3: AIRWAY:

The airway runs from just outside the casualty's mouth down to their lungs. You must ensure the airway is maintained - clear and open at all times.

If necessary open the airway by:

  • Opening the casualty's mouth.
  • Check inside the mouth and carefully remove any obstructions.
  • Tilt the casualty's head back. Do this by placing two fingers of one hand on the casualty's chin, the other hand on the casualty's forehead and gently rocking back the head.

Primary Survey 2: RESPONSE

Primary Survey 2: RESPONSE:

After removing any danger from yourself and the casualty you need to quickly assess the casualty's level of responsiveness. This is to make sure they really do need help and aren't just asleep or behaving unusually.

The casualty will fall into one of the following categories:
  • ALERT - a casualty who is talking and aware of their surroundings.
  • VOICE responsive - a casualty who responds to a verbal command.
  • PAIN responsive - if they don't respond to a verbal command pinch their ear lobe or back of hand to see if this provokes a response.
  • UNRESPONSIVE - a casualty who doesn't respond to a verbal command or painful stimulus.

Primary Survey 1: DANGER


Primary Survey 1: DANGER:

The very first thing you should do when you approach a casualty is check for danger to yourself - we don't want two casualties and no-one to summon help. It is tempting to rush straight to the aid of an injured person - don't. Try and compose yourself and take few seconds to look around and check the scene is safe beforehand.

Remember to look for hidden dangers like electricity, overhead hazards and poison gases.

Remove the danger from the casualty before you try and give first aid.

Primary Survey

Primary Survey:
The primary survey is the action you should take every time you come across a casualty. The primary survey has 5 parts to it:
  • DANGER - check the scene for danger.
  • RESPONSE - check the casualty's responsiveness.
  • AIRWAY - check airway is clear and maintained.
  • BREATHING - check the casualty is breathing.
  • CIRCULATION - check the casualty for signs of life.
Use commonsense when doing the survey - a casualty who is talking has a clear airway, is breathing and shows signs of life so there is no need to check!

See the 5 lessons which accompany this entry.

Choking


Recognition:

Choking is caused by a foreign object becoming lodged in the top of the airway. Choking comes in two categories - mild and severe. In all cases the casualty will be in visible distress, trying to gasp for breath and will become discoloured in the face. A casualty with mild choking will be able to cough out the obstruction by themself. In the case of severe choking the casualty will struggle to cough, speak and breathe - they need urgent help to remove the obstruction before they lapse into unconsciousness.

Treatment (Adult or Child):
If the casualty appears to be choking:
  • Ask the casualty to cough. If the obstruction becomes dislodged remove it from the casualty's mouth.
  • If the obstruction remains give the casualty up to 5 sharp back blows:
    • Strike between the shoulder blades in a firm upwards motion.
    • If the obstruction becomes dislodged remove it from the casualty's mouth, if not perform abdominal thrusts.
  • If the obstruction remains give the casualty up to 5 abdominal thrusts (picture above):
    • Put your arms around the casualty from their back to front.
    • Position your hands over the stomach of the casualty.
    • Make a fist with one hand and grasp the fist with the other hand.
    • Firmly pull your fist in an inwards and upwards motion.
    • If the obstruction becomes dislodged remove it from the casualty's mouth.
  • Give two more cycles of back blows and abdominal thrusts if the obstruction is still not clear.
  • If the obstruction is not clear after your 3 cycles of back blows and abdominal thrusts call 999.
  • Continue until help arrives.
Treatment (Infant <1 year)
If the child is visibly distressed, unable to cough or breathe:
  • Lay the infant along your forearm with their head low and support their back and head.
  • Give up to 5 back blows:
    • Be firm but not too hard.
    • If the obstruction becomes dislodged remove it from the casualty's mouth.
  • If the obstruction remains turn the casualty on to their back and give up to 5 chest thrusts:
    • Use two fingers, push inwards and upwards (towards the head) against the infants breastbone, one finger's breadth below the nipple line.
    • The aim is to relieve the obstruction with each chest thrust rather than necessarily doing all five.
  • Give two more cycles of back blows and chest thrusts if the obstruction is still not clear.
  • If the obstruction is not clear after your 3 cycles of back blows and abdominal thrusts call 999.
  • Continue until help arrives.

Chest Pain


Unless there is obvious evidence to the contrary (eg. someone has just been winded playing sport) always assume the worst when it comes to chest pain - treat as a heart attack.

Angina is another possibility. If the casualty is having an angina attack they will usually know about their condition, have medication and tell the first aider about it.

A heart attack occurs when the coronary artery, which supplies the heart muscle with oxygenated blood, becomes occluded - this causes the muscle beyond the occlusion to die. Angina is due to temporary narrowing of the coronary artery - this results in less oxygenated blood getting to the heart muscle.

Signs and symptoms:
The casualty will complain of persistent 'crushing' chest pain maybe radiating to their neck, jaw and arms. They will normally be breathless, have pale 'ashen' skin and possibly blueness of the lips (called cyanosis). Their pulse will be rapid, weak and irregular. It is also common for the casualty to be cold and clammy to the touch. Vomiting and nausea are also common symptoms.

Treatment:
All Cases: Sit the casualty down in the 'W' position.
Angina: If the casualty has medication for their condition help them to take it.
Heart Attack: Dial 999 ASAP.
Angina: If the casualty's condition doesn't ease within a few minutes of them taking their medication call 999.
All Cases: If possible give an adult casualty (not a child) an aspirin tablet to slowly chew. Monitor the casualty closely until help arrives - keep a note of pulse and respiration rates. Be prepared to give CPR if the casualty stops breathing (see Adult Basic Life Support).


First Aid Kits - What to Include


First Aid Kit Contents:
The contents of your kit depend on where it is going to be located. A home kit will be more basic than a kit located in a large shopping mall. A travel kit may include items you don't necessarily use at home.

My recommendations for a home kit:
20 Plasters (assorted shapes and sizes)
1 Large wound dressing (for bleeds)
2 Medium wound dressings (for bleeds)
1 Eye pad
2 Triangular bandages (for support)
2 Crepe bandages (for support)
2 Non-adherent dressings (for burns)
Safety pins
Tuff cut scissors
Face shield (for giving CPR)
Antiseptic wipes
Disposible gloves (nitrile preferred to latex)
Guidance leaflet

My recommendations for a work kit:
20 Plasters
2 Eye pads
4 Triangular bandages
6 Medium wound dressings
2 Large wound dressings
4 Crepe bandages
4 Non-adherent dressings
Safety pins
Tuff cut scissors
Face shield (for giving CPR)
Antiseptic wipes
Disposible gloves (nitrile preferred to latex)
Guidance leaflet
List of qualified first aider's names and contact details

Key Points:
1. Remember to keep your kit in a prominent location. Make sure everyone in the home knows where it is. In the work place make sure employees know where the kit is and who the qualified first aiders are.
2. Regularly check your kit to make sure the contents are present and still in date. Be sure to replace contents which are absent or have expired.
3. Replenish your kit every time you use it.

Adult Basic Life Support


Adult Basic Life Support:
If you find a casualty who is not breathing you need to breathe for them by giving them Rescue Breaths. If they show no signs of life (no obvious signs of circulation) you also need to give them Chest Compressions. Chest Compressions are vital for pumping oxygenated blood around the casualty's body - particularly to their brain and other vital organs.

This is summarised in the flow chart above (click image to enlarge).